Shhhhhh!
I don’t
want anyone to know that I often do things that are downright easy to do. I
learned how to do these trays last year in Naples, Florida when I was doing a
tag team workshop with Hayne Bayliss. Hayne does some great hand building and
much more complex than I want to tackle.
Here is the
process in a nutshell.
I roll out
a bunch of slabs. I have a 1”thick piece of plywood the size of the tray I want
to make that I place on the slab. You could have fancy petal rims on your trays.
Mine are rectangular and square. I cut
out the clay and soften the edges where I cut by putting a piece of newspaper
over the slab and rubbing the edge thru the newspaper. The arts section or the
sports sections work best. I have found the obituaries really kill the work. I
then let the slabs set up on sheets of drywall. When I think the slab will hold
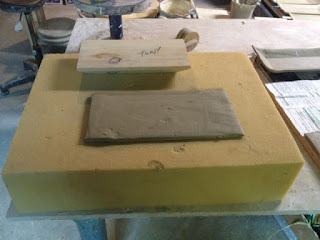
it’s shape I take it over to my oversize piece of foam rubber and press down on
it with the wooden shape. You can use a smaller piece of plywood for the center
and just push down on it. Glue a handle
on the plywood so you can push down and lift it out. This is the not so handy guy’s hydraulic Ram
Press. I put the trays on a board and handle them in the morning. Easy peasy.


Comments